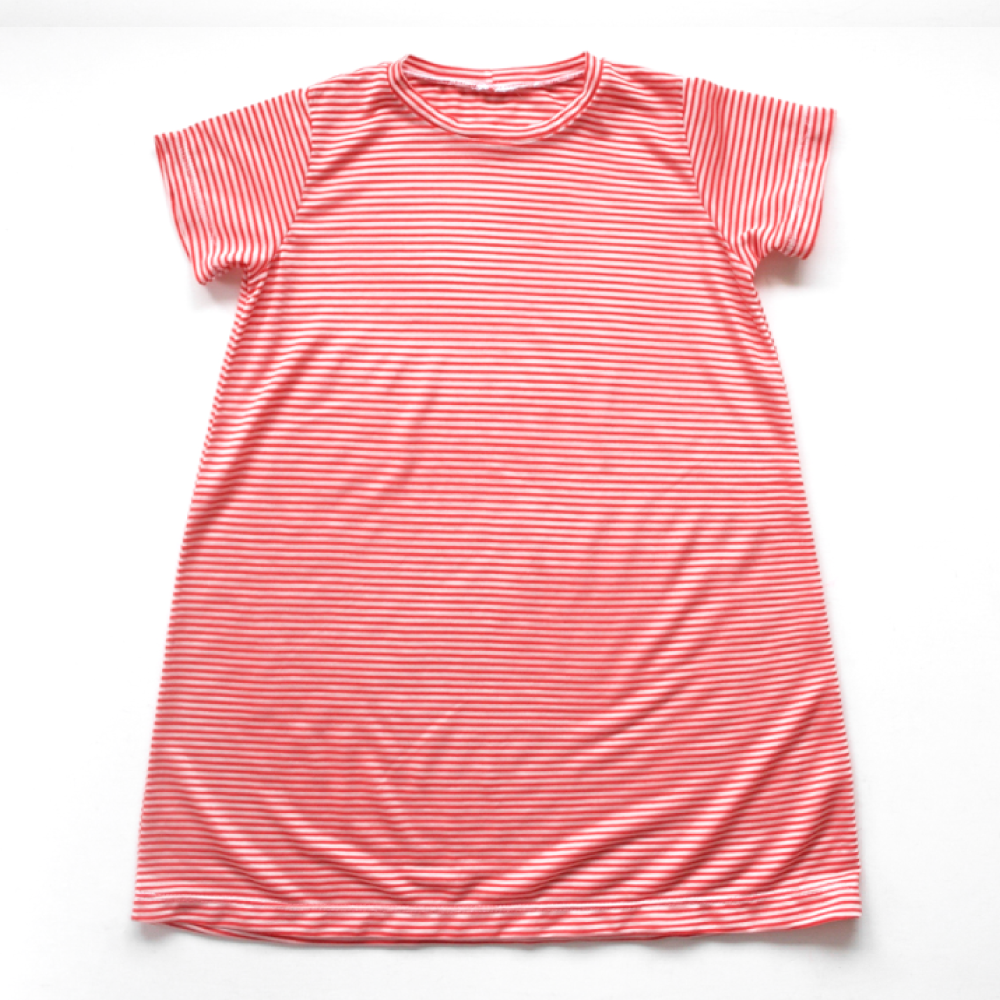
Turn your t-shirt pattern into a dress with this pattern hack!
While the steps in this pattern hack are for the Hey There Threads Basic Tee, you can absolutely use these same steps and procedures for any t-shirt pattern that you have. You many find you need to make some alterations (to the length and the amount of flare you add for example) but the principles will still apply.

Let’s start with the video version.
Maybe you don’t like video versions? So here, I wrote it down for you too.
1.
Print and cut out your pattern pieces.
It’s kinda important to make sure you use a super sharp pencil, or preferably, a pacer. The nice sharp point makes a super crisp, thin line, much easier for cutting and creating an accurate pattern piece. In the video below I’m using big fat marker pens to make it easier for you to see the adjustments I’m making. The problem with using these thicker pens is that now the line is 3 or 4 mm wide, which may not seem like much, but depending on where you cut the line, that can add an extra 1.5cm ease to your pattern or more when you add it all up.
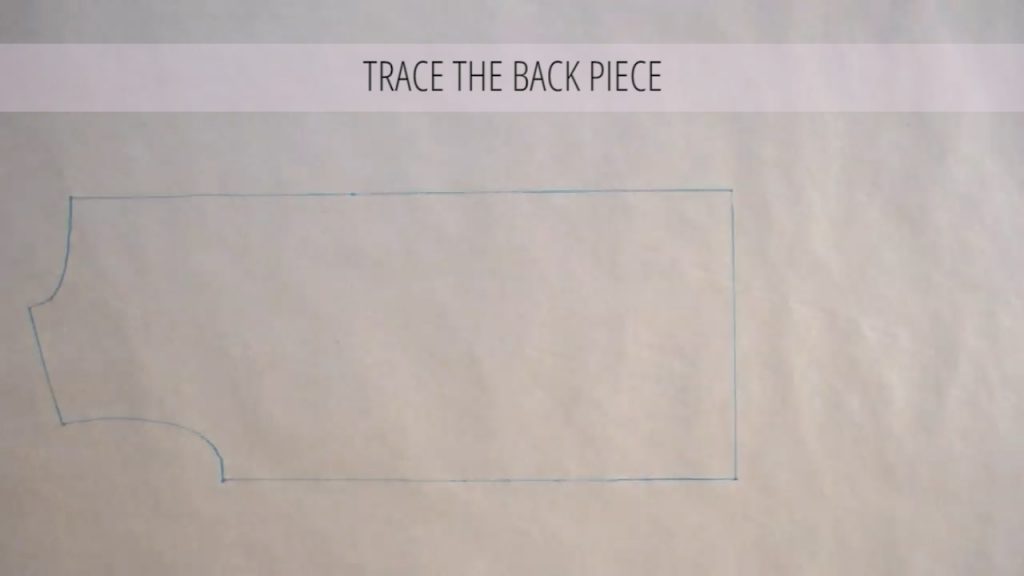
2.
Trace the Tee BACK onto a working piece of paper, the paper you will make all the adjustments on. I use a roll of 90cm wide brown kraft paper. You can buy a roll of 50m for around $20 at Officeworks, or you could even just buy a roll of tracing paper from the supermarket and use that. (Because it’s narrower, you will probably need to tape two sheets together.)
3.
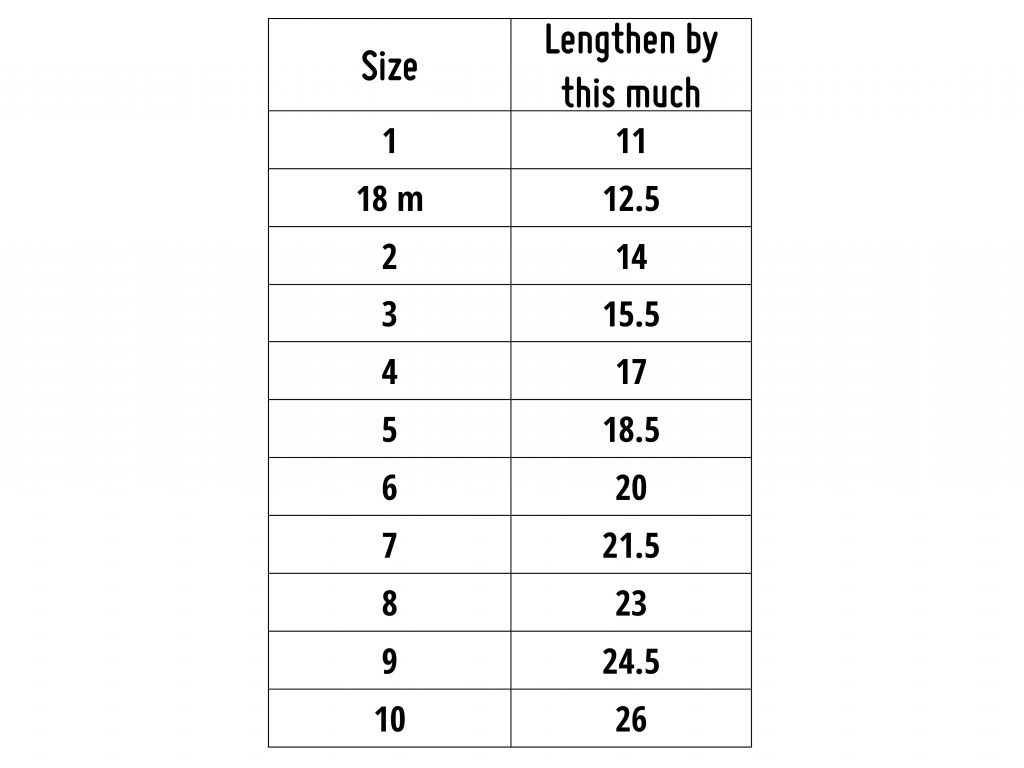
Extend the tee to the length you want your dress to be. You can do this by using the suggested lengths below (these depend on how tall the kiddo is you’re making the dress for and how long you want the finished dress to be, but these are a good place to start), OR you can measure from the nape of your kiddo’s neck, so where the neckline of the tee would be, and measure down to where you want the dress to finish. If you choose the first option of using the lengths provided, there’s no need to account for extra length for the hem, it’s already included. If you are making a custom length, remember that you’ll need to add extra to allow for the hem. How much extra you add depends on the finish you want, add a little for a small hem, add 2.5-3cm for a wider hem.
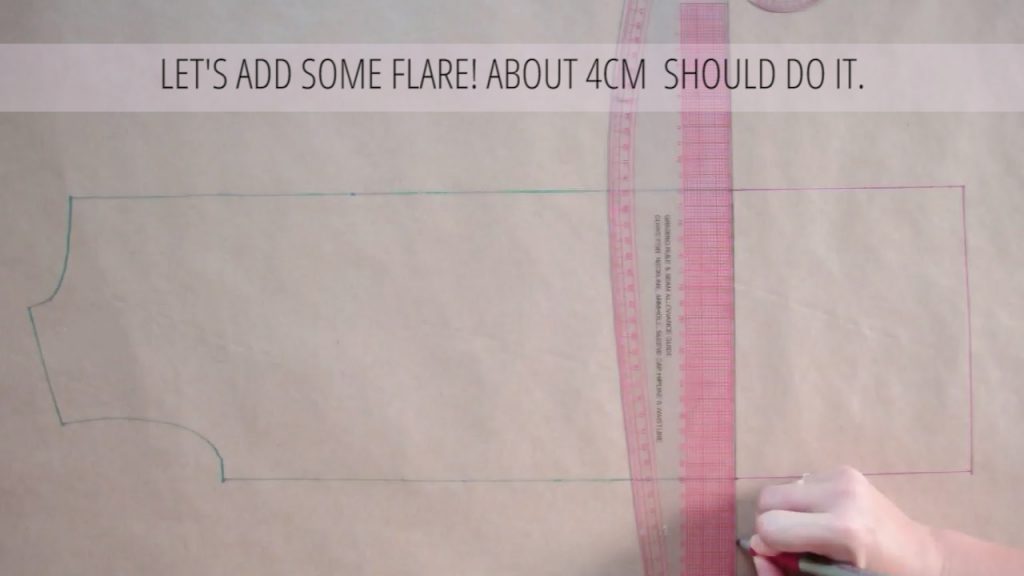
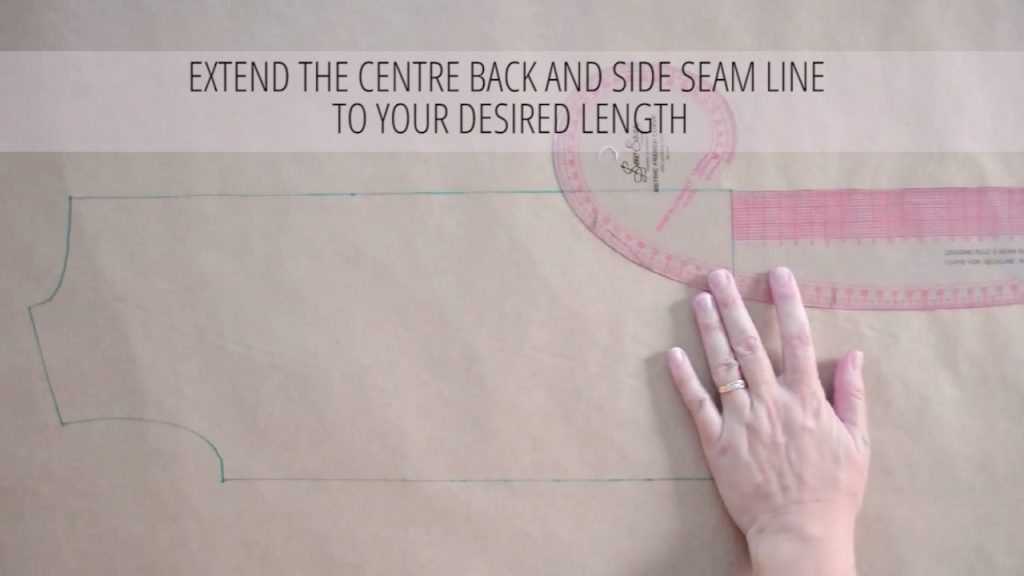
4.
Next we need to add some flare, about 4cm is a good place to start, to the side seams that will turn the tee into a dress. Add this at the waist line. Technically it’s not the waist, it’s the bottom of the hem of the tee, but the this part of the tee sits roughly at the hips depending on how tall the kiddo is you’re making the dress for. If we use this point to add the flare we’ll know that we’re adding the least amount of ease around the torso where we don’t need a whole lot of extra ease, and we’re adding more ease from the hips down, where their legs are. You know, the bits that move and need freedom! You can add as much or as little ease as you like here, it’s a matter of preference and the finished style you’re going for. Too little ease and the dress will be too tight around their legs, too much ease and you risk it looking like a sack you cut some holes in… Start with 4cm and you can increase or decrease for future dresses, once you see how it fits.
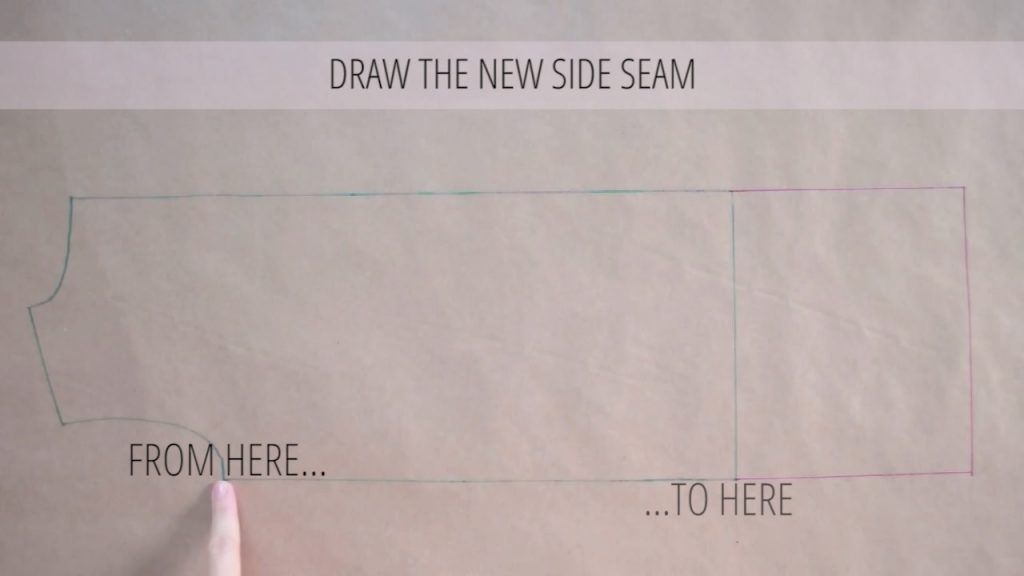
5.
Draw the new side seam. Line up the point at the underarm with the point we just added for the flare, and extend the line all the way down to the hem. Redraw the new hem line.
If we left the side seam and the hem to meet like this, the angles would create a point in the hem of the finished dress, so we’re going to add a little curve to the hem line to help eliminate this.
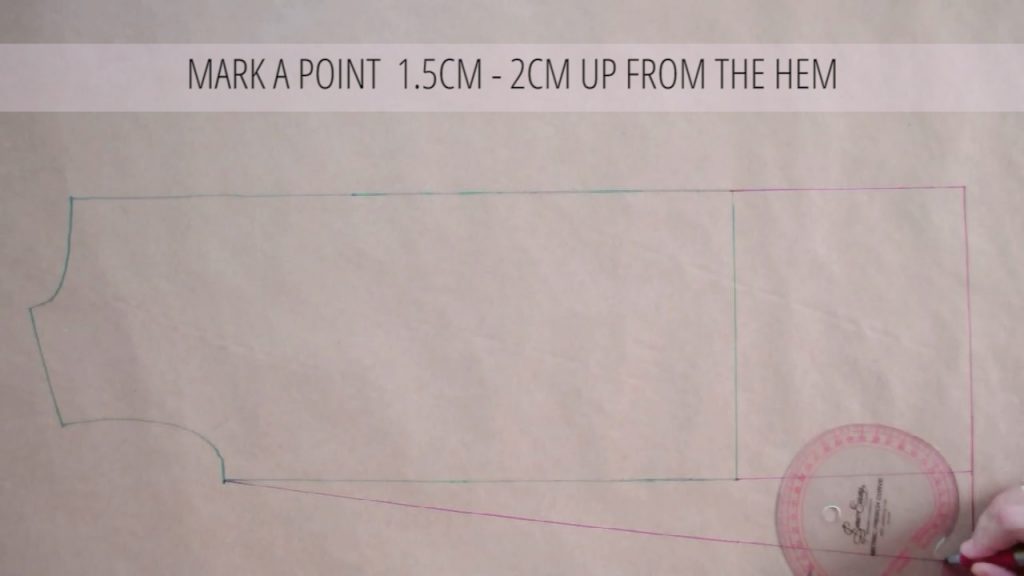
6.
Mark a point about 1.5-2cm up from the hem, along the side hem.
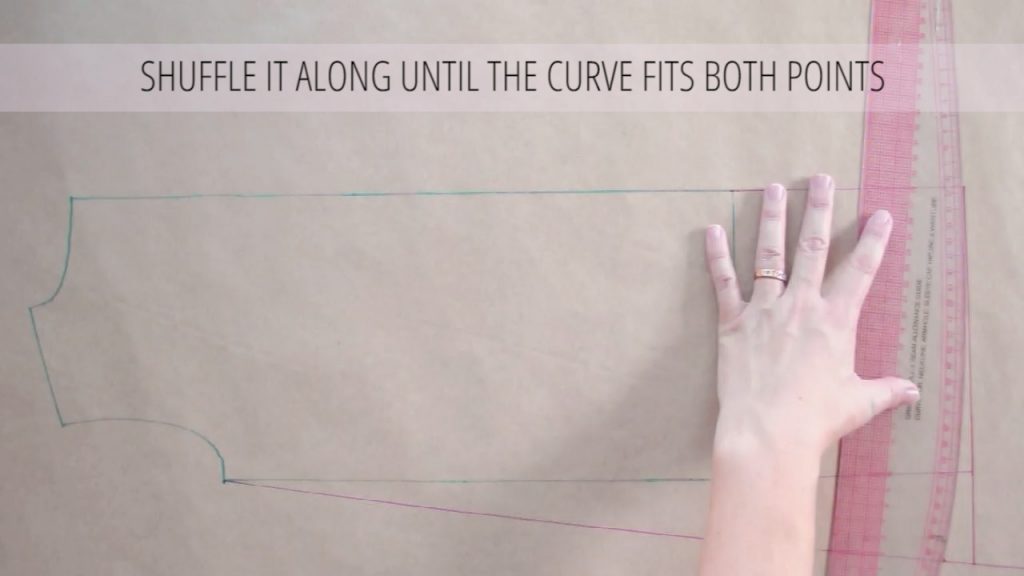
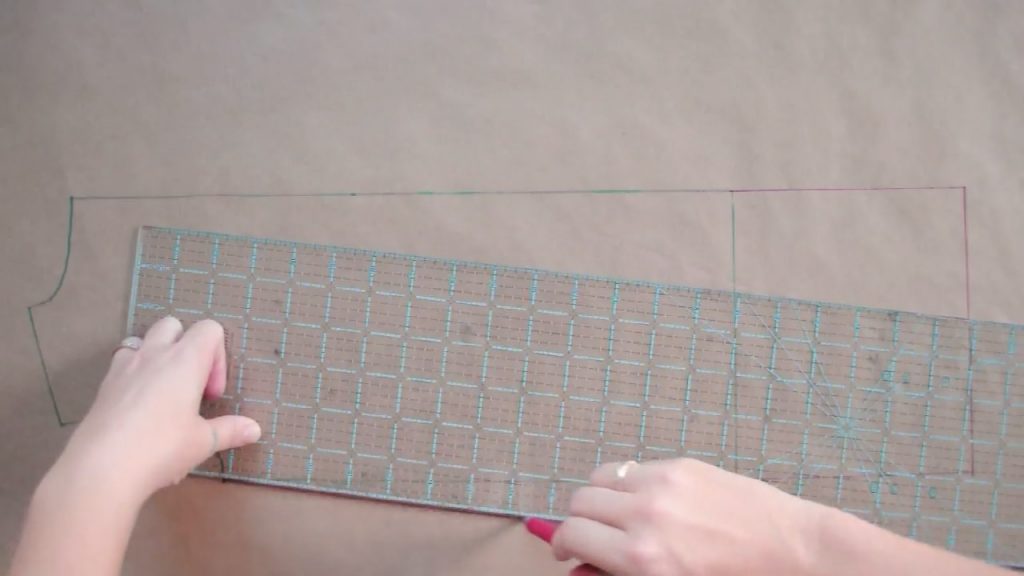
7.
Join the point centre hem point and the point we just made. A French curve comes in super handy for doing the next two points, but if you don’t have one, you can use short, shuffle-y strokes to join the two.
If you’re using a French curve, place the curved edge at the hem line and shuffle it along until the ruler touches both points, the centre of the hem over to the new point along the side seam.
If you’re making a t-shirt dress with sleeves, you’re almost ready to sew your dress! The next step is to cut this new BACK dress piece out and repeat these steps for the FRONT piece.
HOT TIP: Save yourself some time.
Trace the new BACK dress piece onto a piece of paper.
Place the FRONT tee piece over it, lining up the shoulder seams, and draw in the front neckline.
Remove the FRONT tee piece and you now have your dress FRONT piece ready to go.
If you want to make a sleeveless tank dress, keep following along, just a few more steps to go.
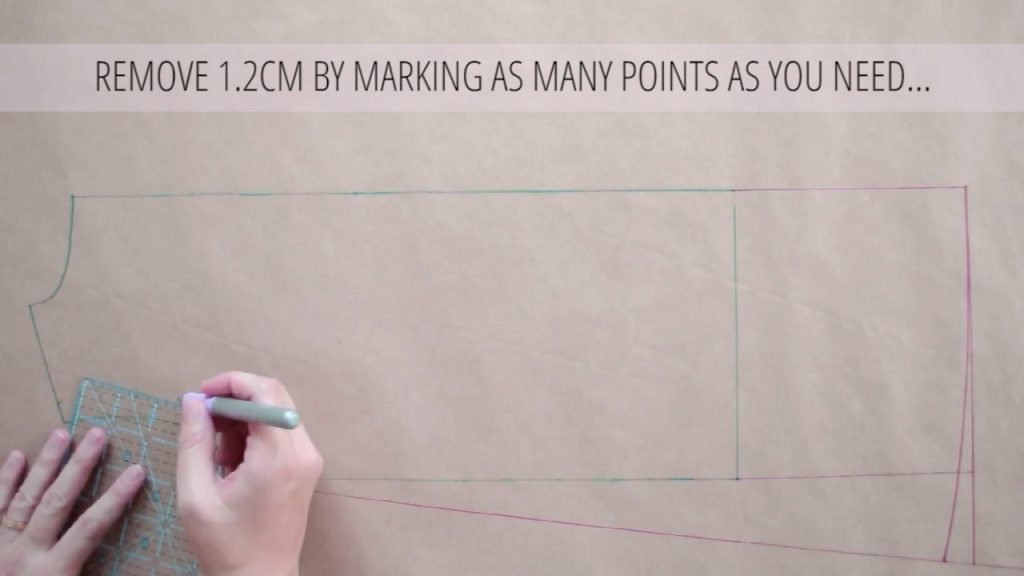
8.
Because we’re not adding sleeves, but the pattern has seam allowance for the sleeves included, we’re going to get rid of this seam allowance first.
The seam allowance in the pattern is 1.2cm (1/2”) so using a ruler (I really love my quilting rulers for jobs like this!), mark as many points along the seam allowance line as you need to be able to join them up and create the new armhole.
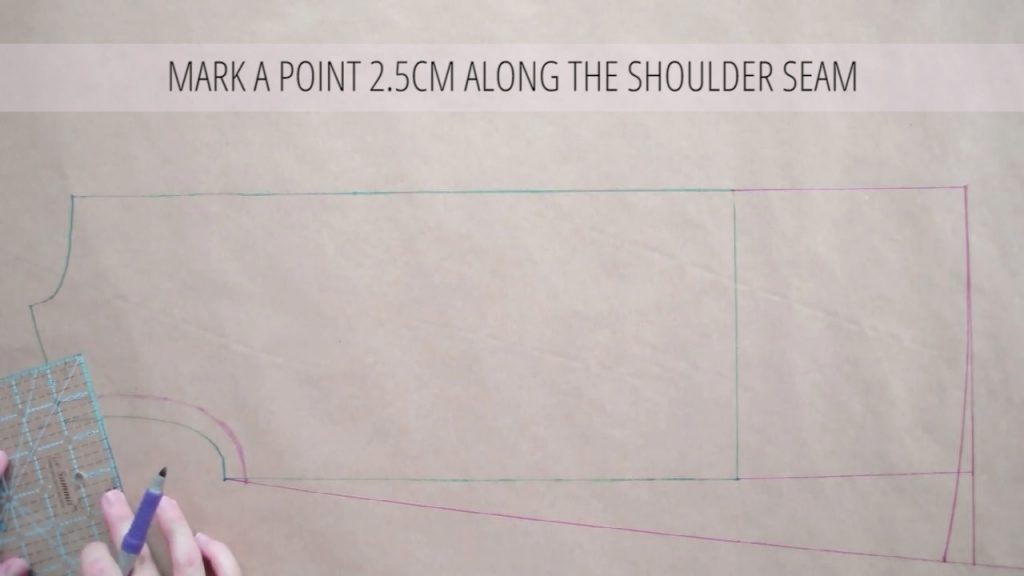
9.
The last step is we need to narrow the shoulders. Mark a point 2.5cm (1”) along the shoulder seam
from the new armhole line we just drew. Using your French curve, or short shuffle-y strokes, blend the armhole line from the new side seam point (that we dropped 1.2cm to remove the seam allowance) and the new shoulder point.
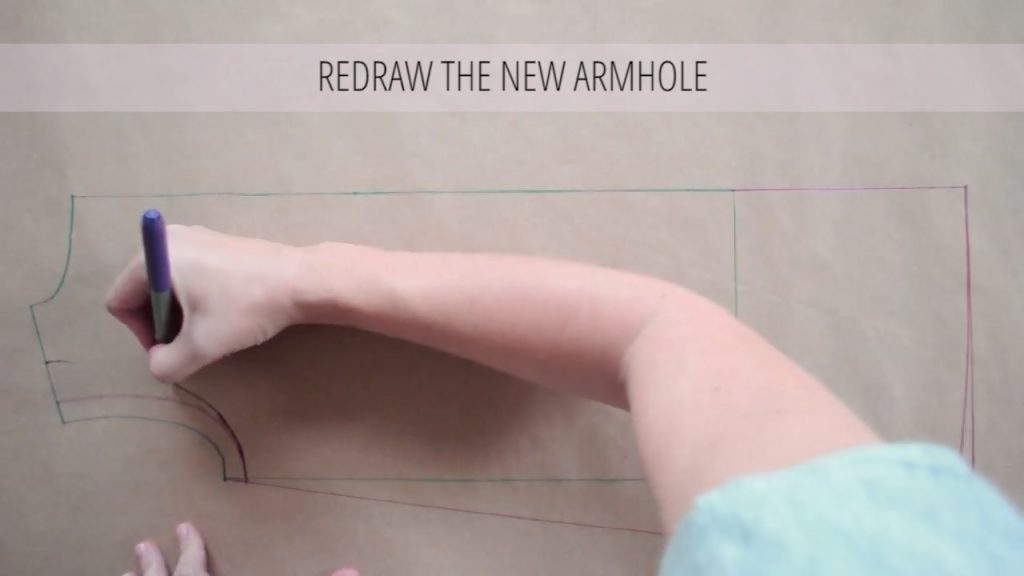
You’ve finished the BACK of your sleeveless dress. Cut it out and trace it onto a piece of paper. Place the tee FRONT piece over the BACK dress piece, lining up the centre fold line and the shoulder seams and draw in the front neckline. Cut it out and you have the pieces for your sleeveless tank dress.
To sew your sleeveless tank dress, follow the instructions for the Basic Tee, but use binding to finish the sleeves.
You can use any basic t-shirt pattern for this pattern hack or you can grab your copy of Hey There Threads’s Basic Tee here.


