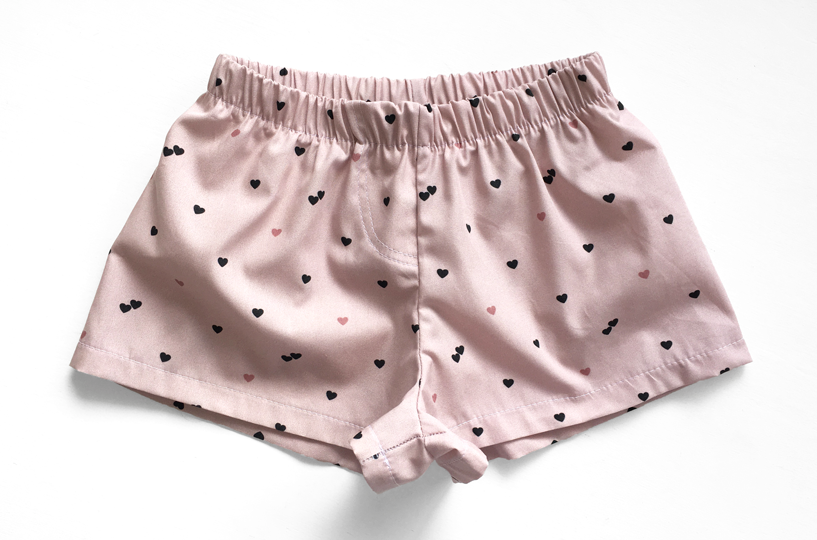
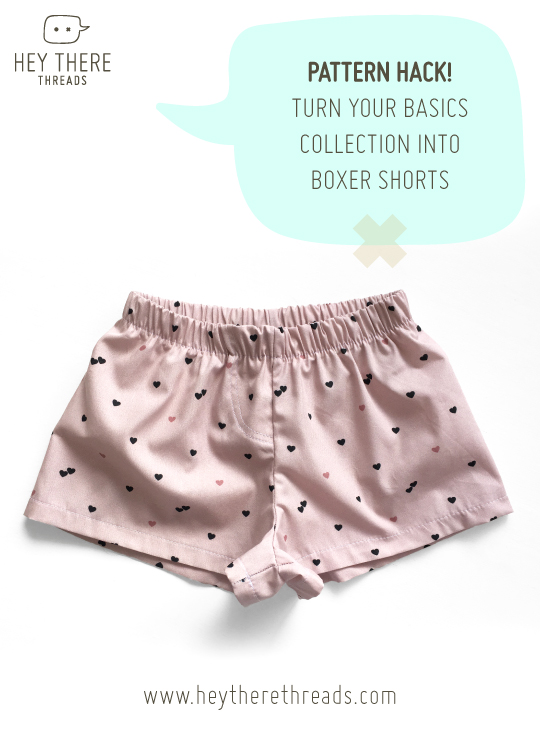
Make a Boxer Shorts pattern from your Basics Collection, one of the most versatile patterns you’ll ever own for your kiddos. I promise it’s super quick and easy. If you can make the 2 piece pattern from the Basics Collection, you can make these boxers for your tiny kiddos.
Do me a solid though, make sure you read, or at least skim, all the way to the end before you cut anything. (Ok fine, I know you’re not going to do that so just go and read step 11 before you cut.)
Things you’ll need:
- a copy of the Basics Collection
- a fabric pen.
- 25mm (1″) knitted elastic
- Some lovely voile, lawn or light poplin is the perfect fabric for this pattern hack.
Cause I’m a lazy pants and like to do things the fast and easy way, we’re going to do all of our ‘hacking’ directly onto the fabric. I like fabric pens because they are easy to use on almost all fabric types and easy to remove, but you can use tailor’s chalk, too. Oh and spoiler alert: while this hack is for the Basics Collection any shorts pattern will do!
How to:
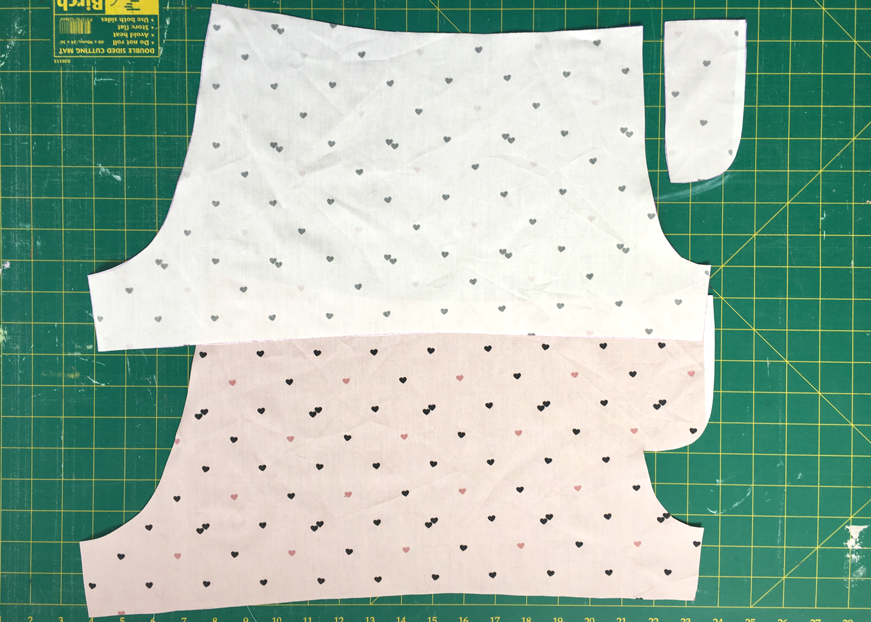
1. Trace the pattern directly onto the wrong side of the fabric. I’m making size 4 and I’ve doubled the fabric over so I only have to trace and cut once.
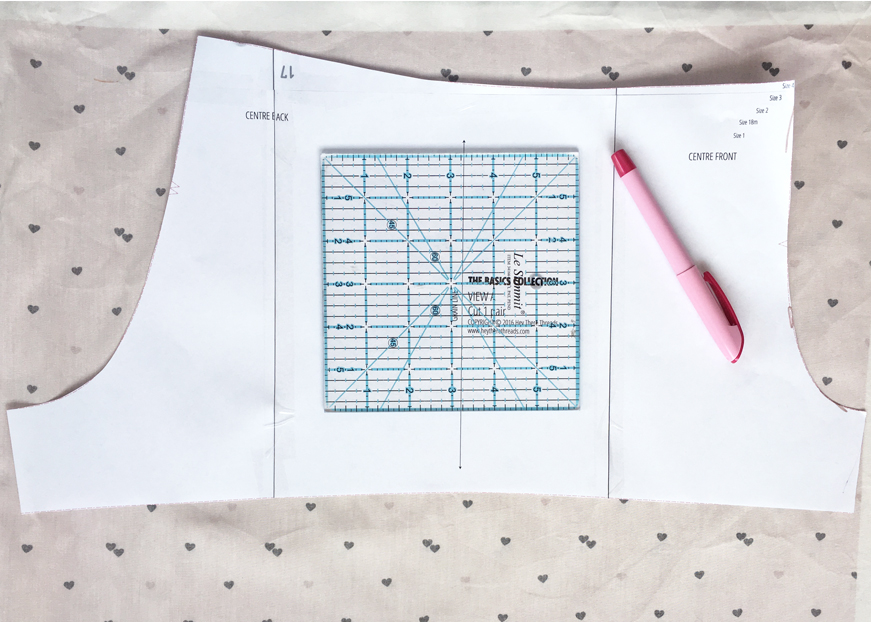
2. Remove the pattern piece.
3. Align faux zipper pattern piece and trace around it. (Download it HERE. Or make it up yourself, you can do it!)

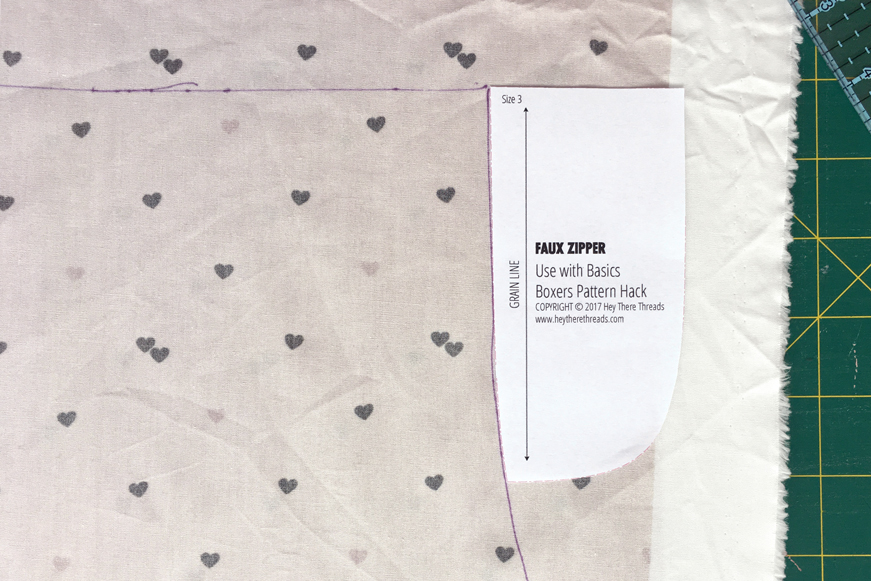
4. Cut pieces out.

5. We only need one side to have the extra piece, so take the top piece, the one you traced the pattern onto, and trim off the faux zipper.
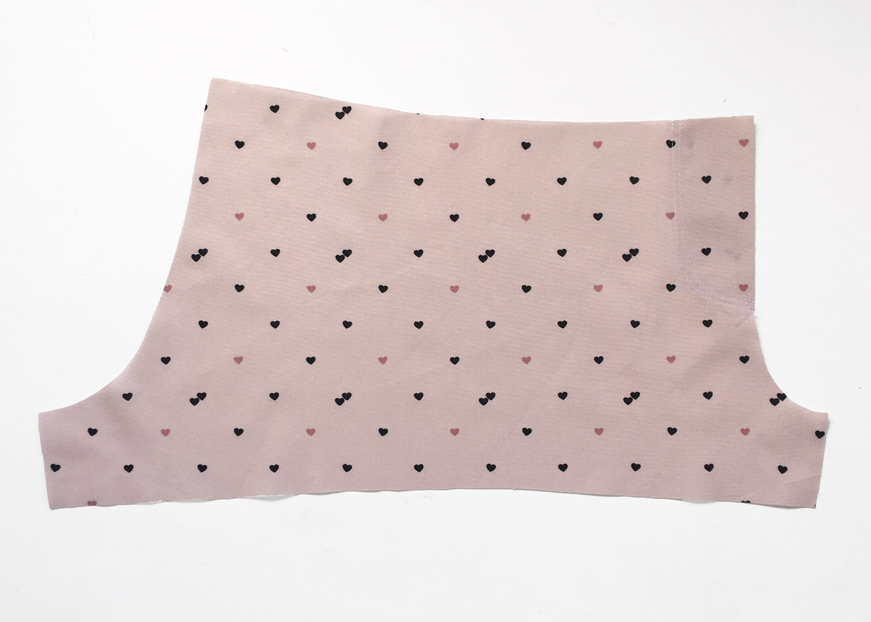
6. Take the piece with the faux zipper still remaining and overlock (or zig zag stitch) the raw edge of just the extra zipper piece.

7. Fold the faux zipper piece over and press.
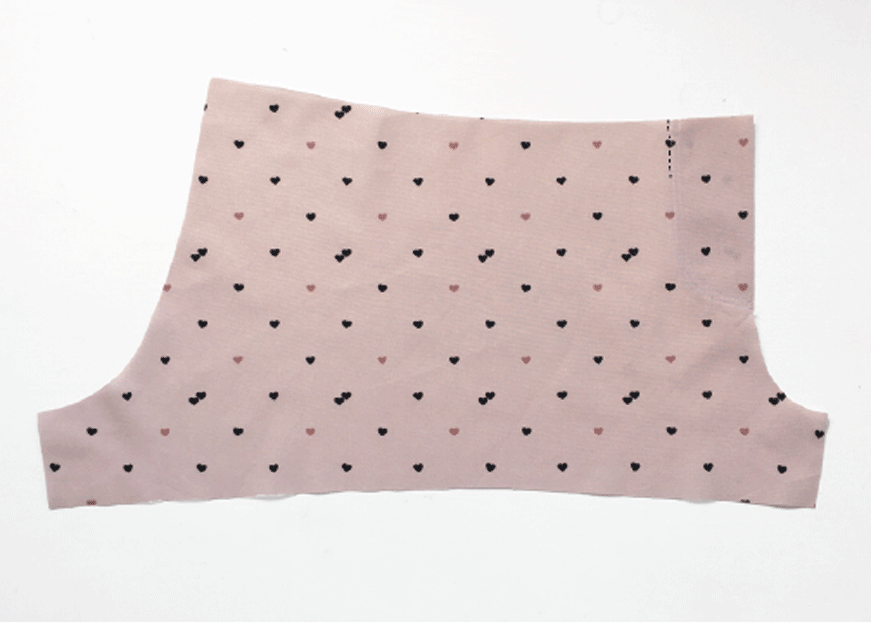
8. Sew the zipper panel down. There are a few ways you can do this. Trace the faux zipper piece using an erasable pen or tailor’s chalk. You’ll need to move it over 6mm (1/4″) and up 6mm (1/4″) to make sure you catch the underneath piece when sewing. I do mine by feel (see above, I like fast and easy). You’ll be using a light cotton so you’ll be able to feel, maybe even see the overlocked seam on the underside. If you’re using voile (or have completely lost your mind and want to endure the pain that is sewing with satin), you’re probably going to want to pin the piece down before you sew. Ugh. Extra work. But better to spend your time pinning than unpicking.
9. Start with the outer edge and sew. Start back at the top about 6mm (1/4”) towards the centre front seam and use your zipper foot as a guide to keep the rows equal distance apart. (Please promise me you’ll do a better job of the equal distance than I did in my gif making…?)
10. Continue sewing your boxers using the 2 piece shorts pattern instructions to step 3, but don’t press or sew the waistband yet! We’ll get to that next. Go ahead, I’ll wait.
Ready to go on?
11. Once all the raw edges are overlocked or zig zagged, cut your elastic. Use a soft knitted elastic (gentle on sleeping tummies) and always cut to their actual measurements where you can. Overlap the edges by 1cm and sew a box to hold the ends secure. The original pattern calls for 12mm (1/2″) elastic, however boxer shorts patterns tend to have a wider waist band. Using 25mm (1/2″) elastic will decrease the height of the rise in the boxer shorts slightly.
There’s a few ways you can deal with this.
First, you can add an extra 12mm (1/2″) to the waist band height when you are doing your original hacks onto the fabric in Step 1.
Secondly, you can make your boxer shorts pattern a size bigger than your kiddo typically wears.
Thirdly, you can be a rule breaker (you cheeky devil, you!) and use 12mm (1/2″) elastic.
Lastly, you can do what I’ve done in this hack and not worry about. I’m making a size that will fit my kiddo and the little bit of height lost in the rise is a sacrifice I’m willing to make for the sake of style.
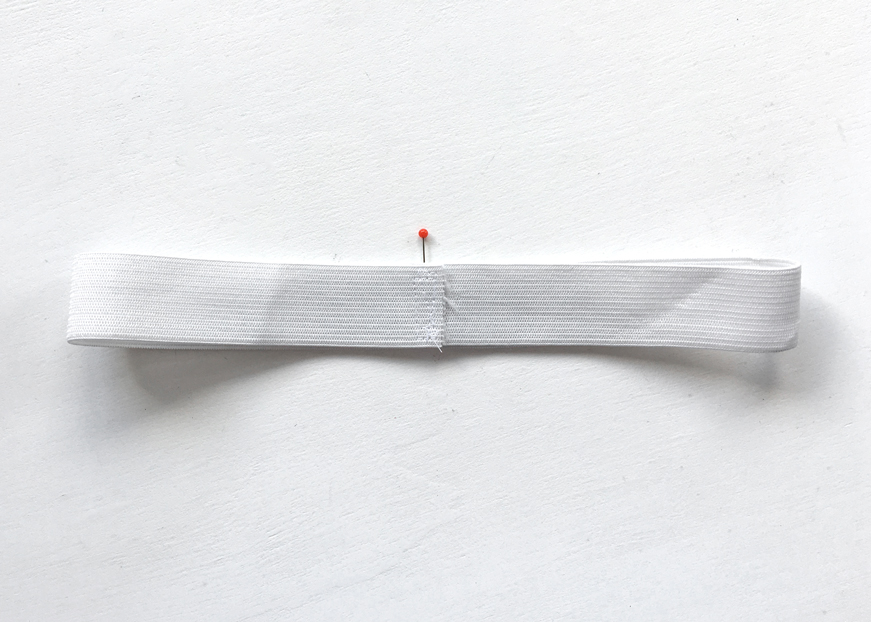
12. Divide and quarter the waistband and the elastic. (Fold the elastic in half using the sewn ends as a marker and place a pin in the fold. Now align the pin and the sewn ends and place a pin on either side at the fold. Repeat the same process for the waist band on the shorts by laying the centre front and centre back seam on top of each other and placing a pin in either side at the fold.)
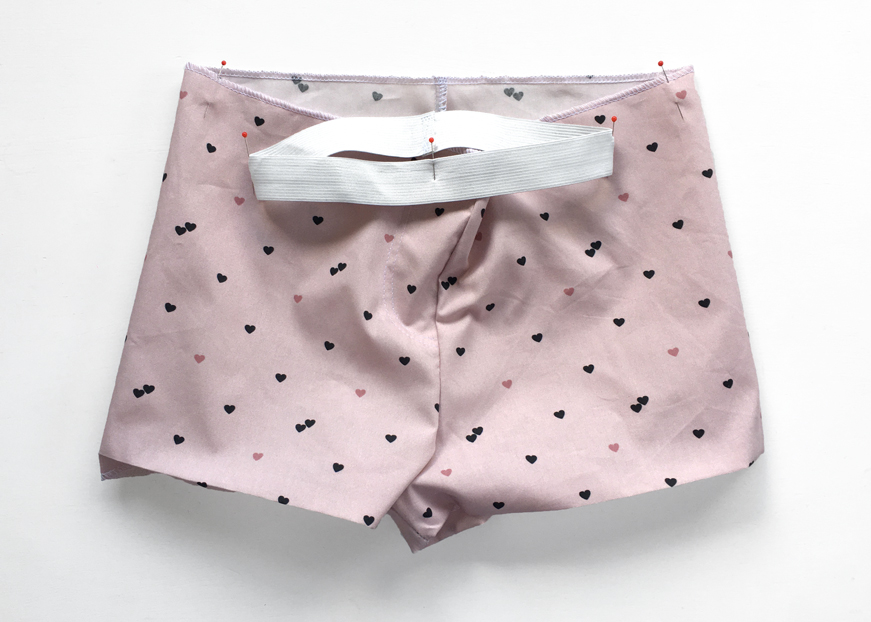
13. With your boxers right side out, place the elastic on top of the boxers. Line up the centre back seam with the join in the elastic and align the overlocked edge and the edge of the elastic.
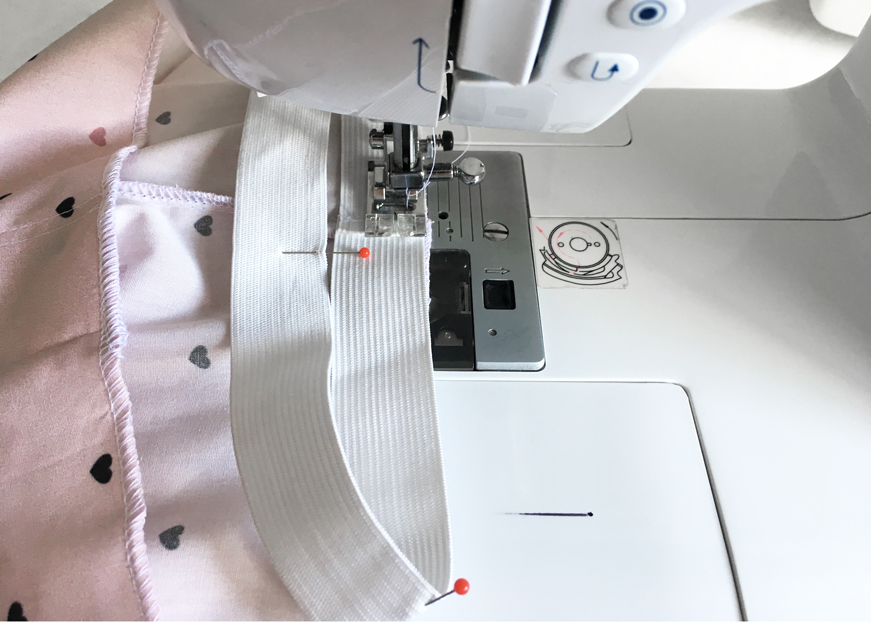
14. Stretch the elastic (but not the fabric) so the first pin marker in the elastic meets the first pin marker in the fabric. Sew the elastic to to the boxers 3mm (1/8th”) from the edge. Continue all the way round, ensuring the pin markers in the elastic align with those in the fabric. This makes sure the elastic is distributed evenly.
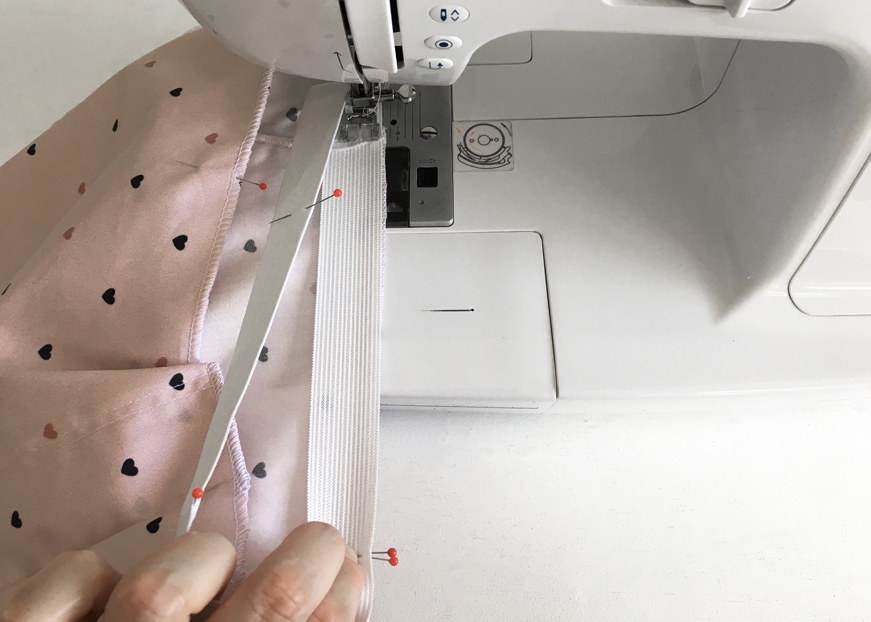
15. Fold the waistband over. The elastic will now be encased between 2 layers of fabric.
16. Pull the elastic taut, careful not to stretch the fabric) and sew the waistband down. It pays to take your time and go slowly with this step.

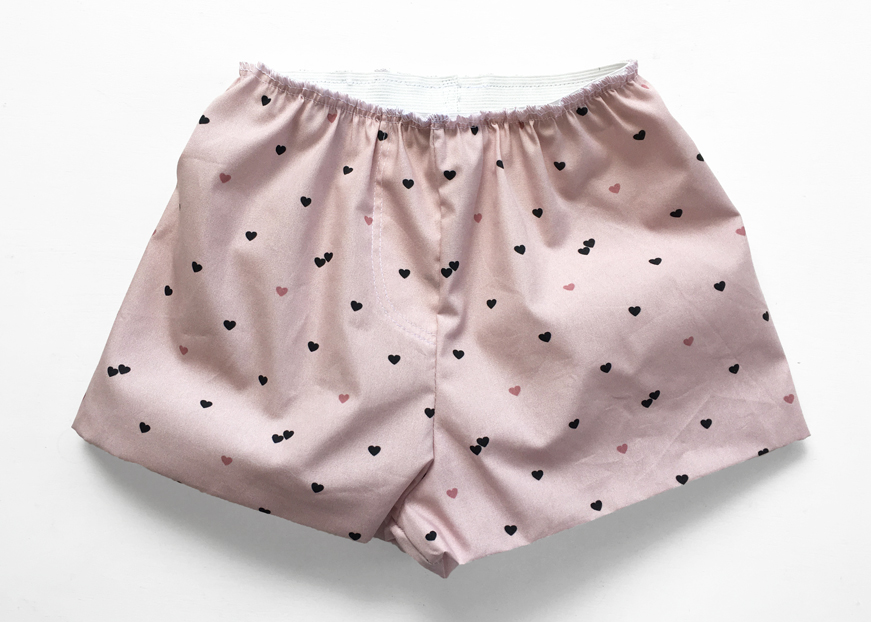
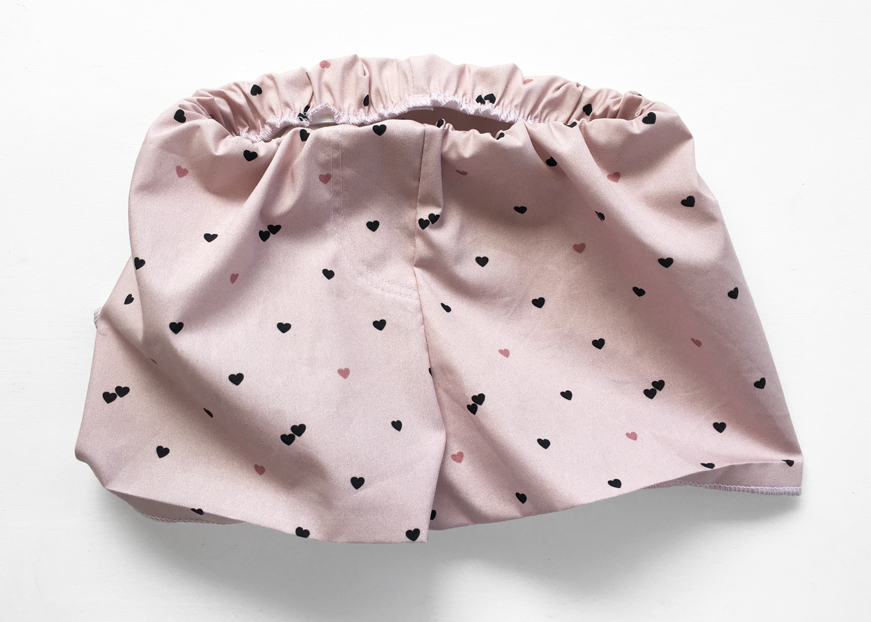
All finished! You’ve just made your first pair of faux zipper boxer shorts. High fives to you.
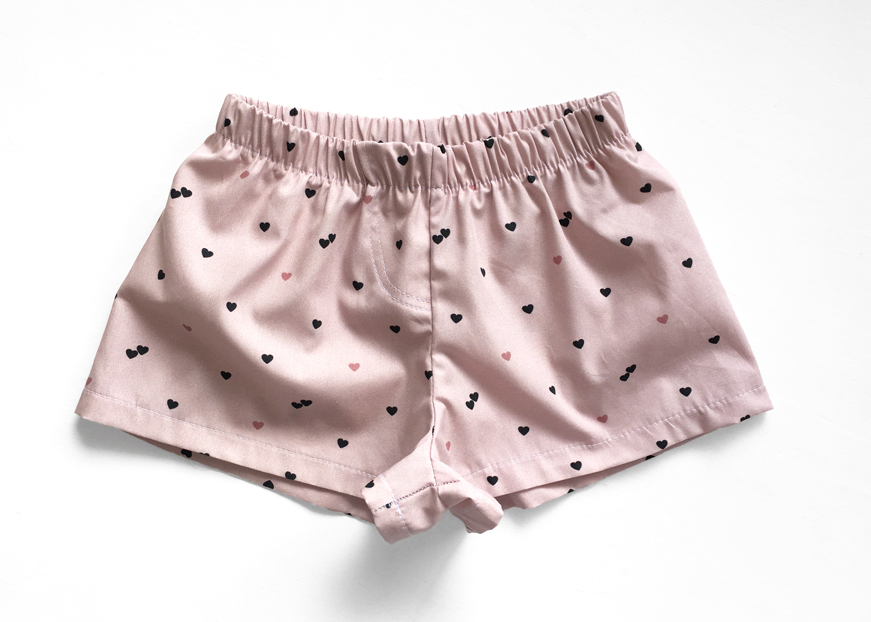
This fabric design is a Hey There Threads original and is available at Spoonflower.


Enjoy daily galleries
http://shemailsex.moviesexsites.miyuhot.com/?kianna
white tranny whores porn how to draw porn sex porn video world long amature porn video porn join actor