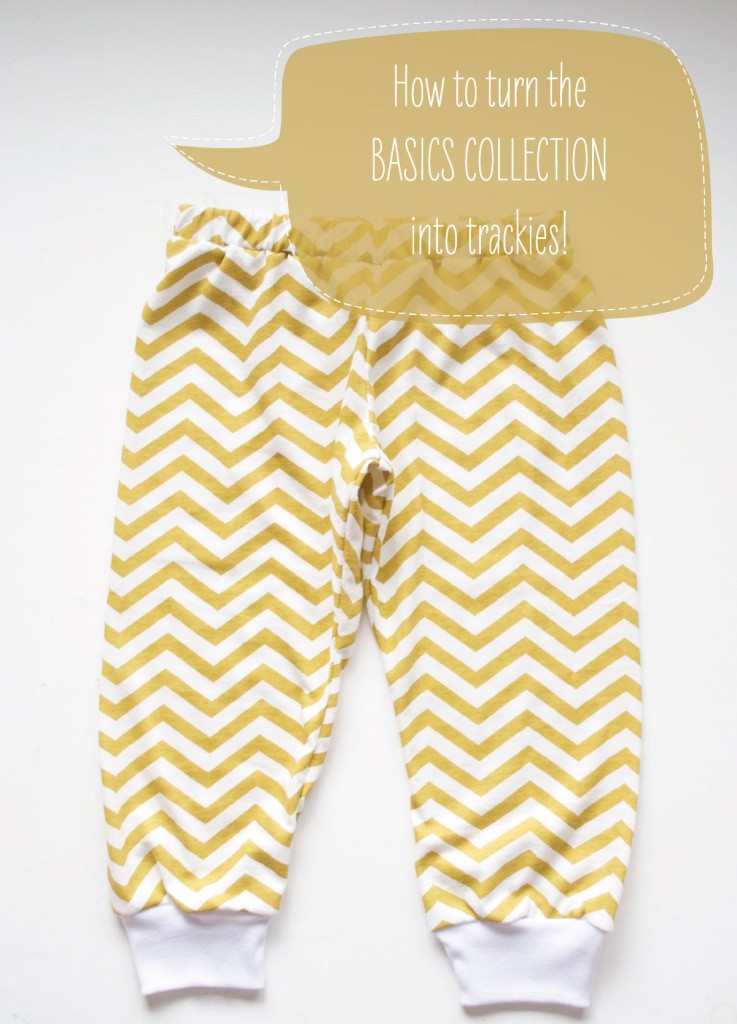
With the colder weather creeping in I wanted to show you you how you can turn the long pants from the Basics Collection into tracksuit pants/trackies/sweats.
Edit: There was an error in the initial post. I said you needed 75% of the width of the bottom of the hem, but you need 60%.
At first I was going to do the hard work (it’s really not hard) and create another pattern piece for the cuffs for free download but then I decided that was pointless. One of the things I’m super passionate about with Hey There Threads and my patterns is to show you that there is no right or wrong way, just the way that works. If it works, who cares how you got there? When you are creating for the sake of creating, making because you love to make, sewing because you’d like to sew your kiddos some new clothes, how you made it doesn’t matter. Over the years I’ve noticed a huge increase in the amount of pattern mash ups and modifications people have been making to patterns and I think it’s brilliant and that we should do it more often. Maybe you’re already doing this, maybe you don’t need me to tell you how to turn the Basics into trackies, but this is post is for those of you who are still feeling a little bit timid about changing stuff up. Maybe you’re still new to sewing and not quite confident enough yet, or maybe you are a stickler for the rules and break out in a rash if things are done the wrong way. (No judgement, we can be friends, come sit at my table, I’m a recovering rule follower too! 😉 )
Some things to note:
For this pair, I’m making a size 4 using the two piece pattern piece, but you can use the inseam or exposed pocket pattern, too. Not goin’ lie, my kiddo would really rather I put pockets in his trackies but I am a mean mummy and he has enough sand collecting clothes. I mean, clothes with pockets. I mean, I’m just feeling lazy, ok?
I’m using knit so I’m doing the whole thing on the overlocker with a 6mm (1/4”) seam allowance. This is smaller than in the pattern instructions but, a) we are practising being rule breakers, b) it’s knit so it’s stretchy and forgiving if you get something wrong and c) they’re trackies… they’re meant to be roomy and comfy so a bit of excess seam allowance in the finished product is not going to hurt. I also did the waistband on the overlocker, but if you’re not sure how to go about that, just stick with the instructions for the Basics Collection for now and I can bore you to death with that in a later post.
The last thing I wanted to share was, this is a fine/thin interlock fabric as a light extra layer is usually all we need for our Winters. You can absolutely use fleece or a thicker fabric, just be mindful when overlocking the edges as when thicker fabrics are going through, the bottom layer can often be spat out off to the side of the overlocker. Take your time, keep your edges together, and you’ll be fine. And wanting a pair for yourself.
What you need:
• knit fabric (the amount recommended for the size you are making)
• coordinating ribbing – you will only need a small amount for this project, but ribbing is one of those things that is just handy to have around so you might want to consider buying half a meter/yard or more in a few different colours. If you are buying it from Spotlight or similar, you’ll need at least 20cm
• your printed/traced pattern piece(s)
• ruler and pencils/pens
• 20mm (3/4”) elastic for the waistband. Some knits can make the finished garment heavier than if they were made from woven, so the thicker waistband is slightly more taut and helps to hold the pants up.
So, let’s get started.
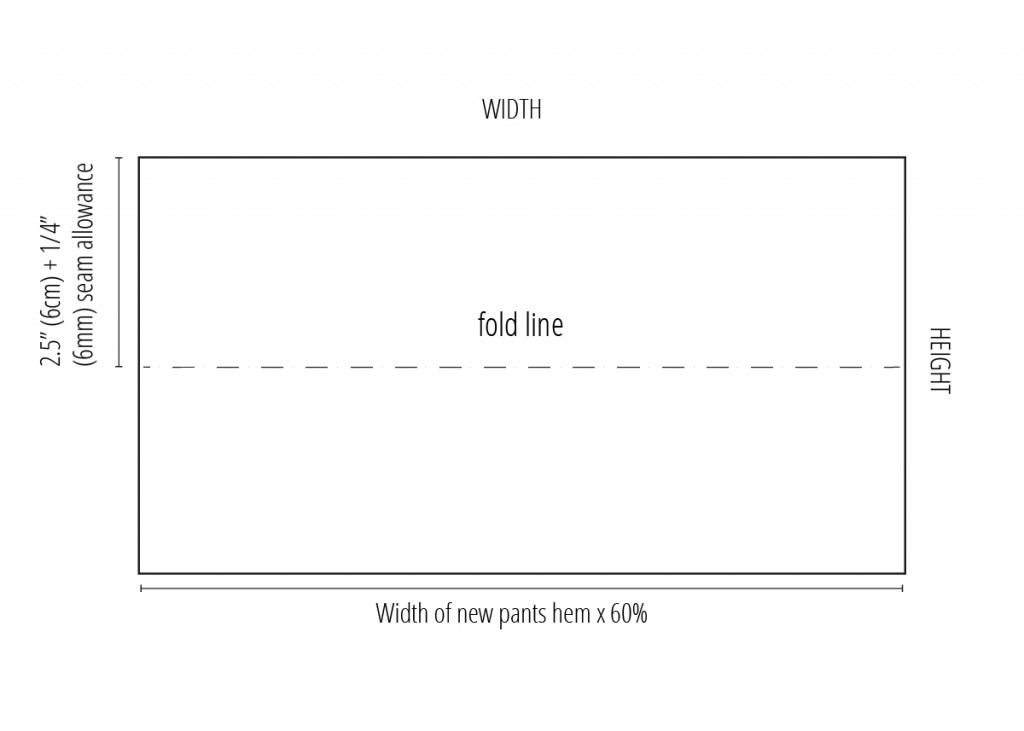
1. Decide how tall you want the cuffs of your pants to be. I chose 2.5” – Depending on the task, I often work in inches because my favourite ruler is actually a quilting ruler and it is in inches. Draw a line 2.5” (6cm) up from the hem of the pants, the green line – as though you were going to cut the bottom off to make them shorter. Now we need to add a seam allowance. Draw a line 6mm (1/4”) below the original green line. This line, red in my case, is now the new hem of our pattern piece.
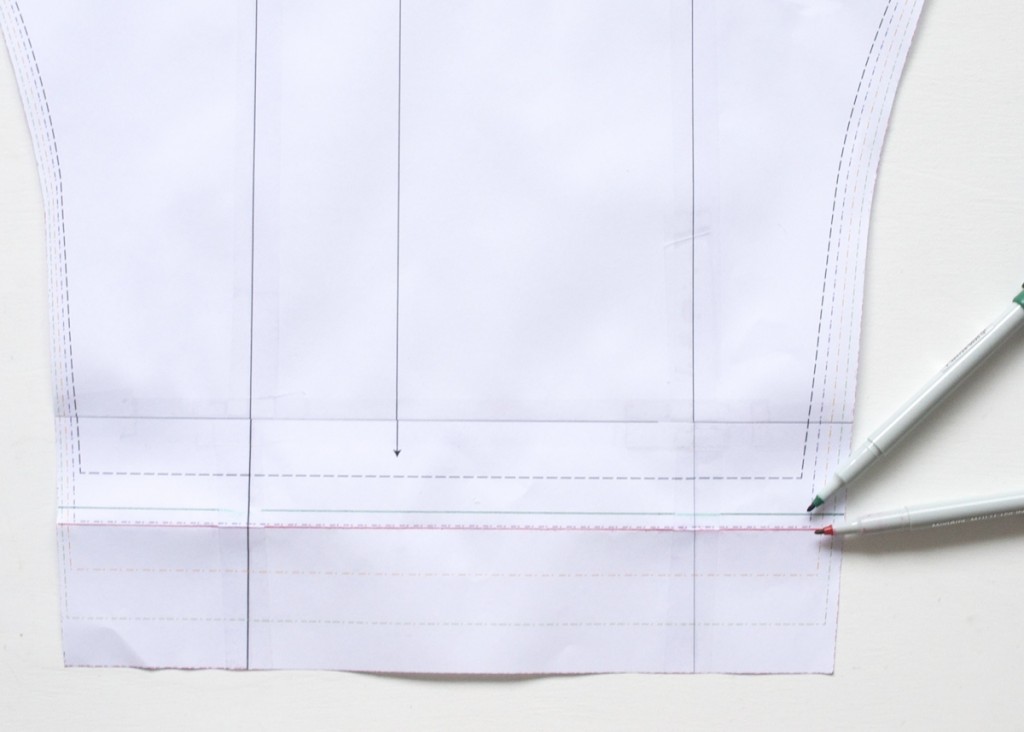
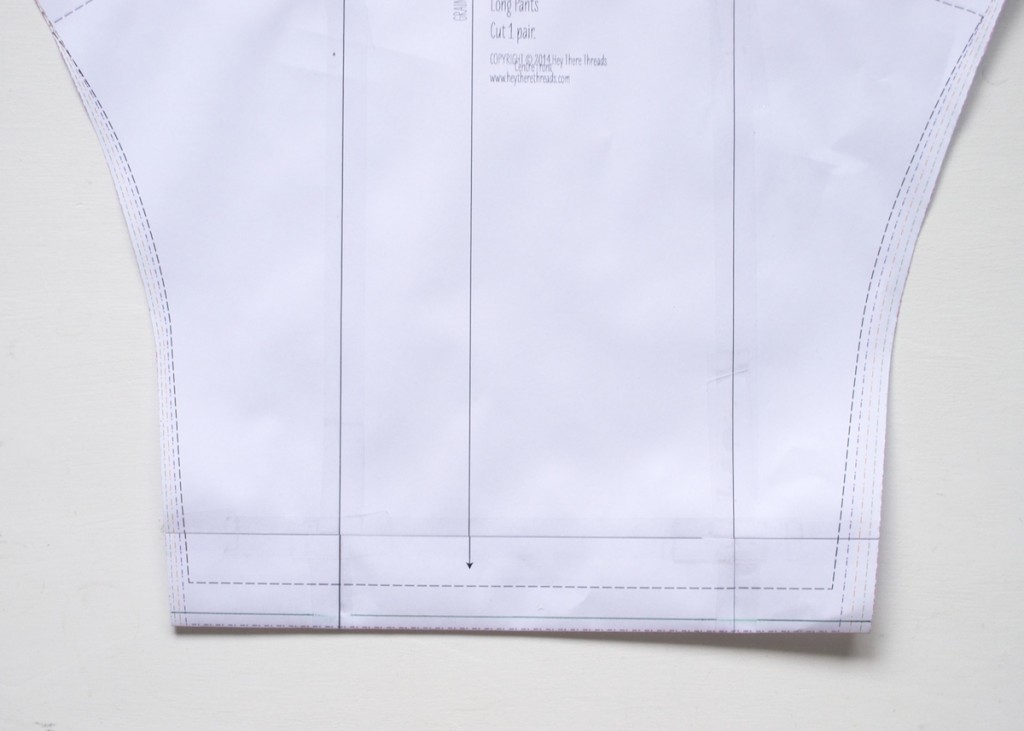
You can choose to cut it here, but printing and taping pattern pieces together makes me want to stab my eyeballs out with a printer cartridge, so just go ahead and fold it back along the bottom line. If you are using the inseam or exposed pocket pattern pieces, repeat this for both pattern pieces, the front and back panel.
2. We have our main piece(s) for the trackies, now we need a pattern piece for the cuffs. The cuffs are going to be rectangles so we don’t need to make a pattern piece so much, more just to find the dimensions for the rectangle. This is the part I was talking about being hard. It’s really not hard at all. Once you have the formula you can adjust it to suit your needs.
The cuffs will be doubled over with a fold on the bottom hem. I took 2.5” (6cm) from the bottom of my pants so I know the height of my cuff needs to be 2.5” (6cm) for the front of the fold, and 2.5” (6cm) for the back of the fold, plus 1/4” (6mm) for the seam allowance on the top of the front and back of the fold. So that makes
2.5” + 2.5” + .25” +.25” = 5.5” high, or, 6cm + 6cm + .6cm + .6cm = 13.2 cm high.
The height of our cuff pattern piece will be 5.5” (13.2cm).
3. Now we want the width of the bottom of our altered pattern piece. Measure the pants hem on the new hem line we made (measure both the front and back panel if you’re doing a pair with pockets). In my case, for a size 4 two piece pattern with a 2.5” (6cm) cuff, it’s 32cm. We want to keep our little ones’ legs warm, so we need to make the cuff fairly fitted. To do this, we’re going to make the cuff piece narrower than the pants piece using this formula:
Width of new pants hem x 60%. So for me, that looks like:
32 x 60% = 24. (In case maths isn’t your thing, do this: Grab your smart phone, go the the calculator, enter 35, multiply key, 60, percentage key (usually up the top right somewhere), equals key.) You’ll notice I haven’t added seam allowance to this piece, and that’s because the main pattern piece(s) that we took our measurements from already have seam allowance included.

My cuff piece will be 13.2 cm (5.5”) high and 24cm (9.5”) wide. Which could have been said much faster if I’d just said, “You need a rectangle twice the height of your cuff plus a little extra for seam allowance, and 75% of the width of the bottom hem of your pants.”, but I used to be an early childhood teacher and I am forever incapable of not breaking things down into their tiniest parts.
4. If you’re still with me, give yourself a high five.
The fiddly stuff is done, let’s go sew our trackies! Sew your pants following the instructions, including the waistband, but DON’T hem the pants. Leave the edges raw and pick up from here:
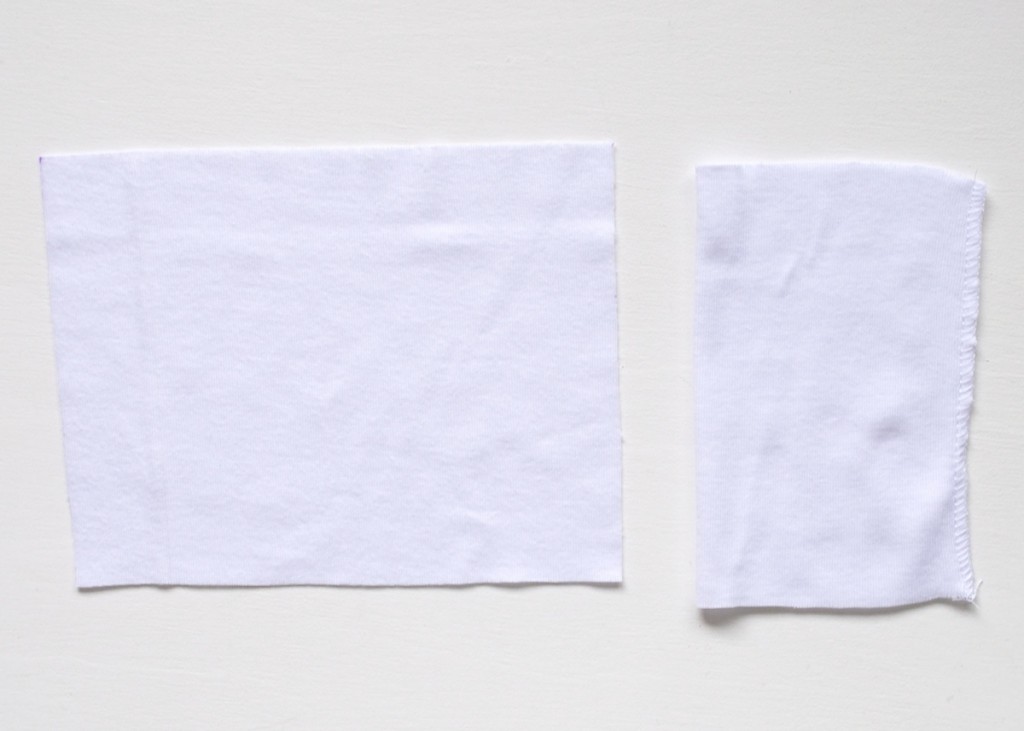
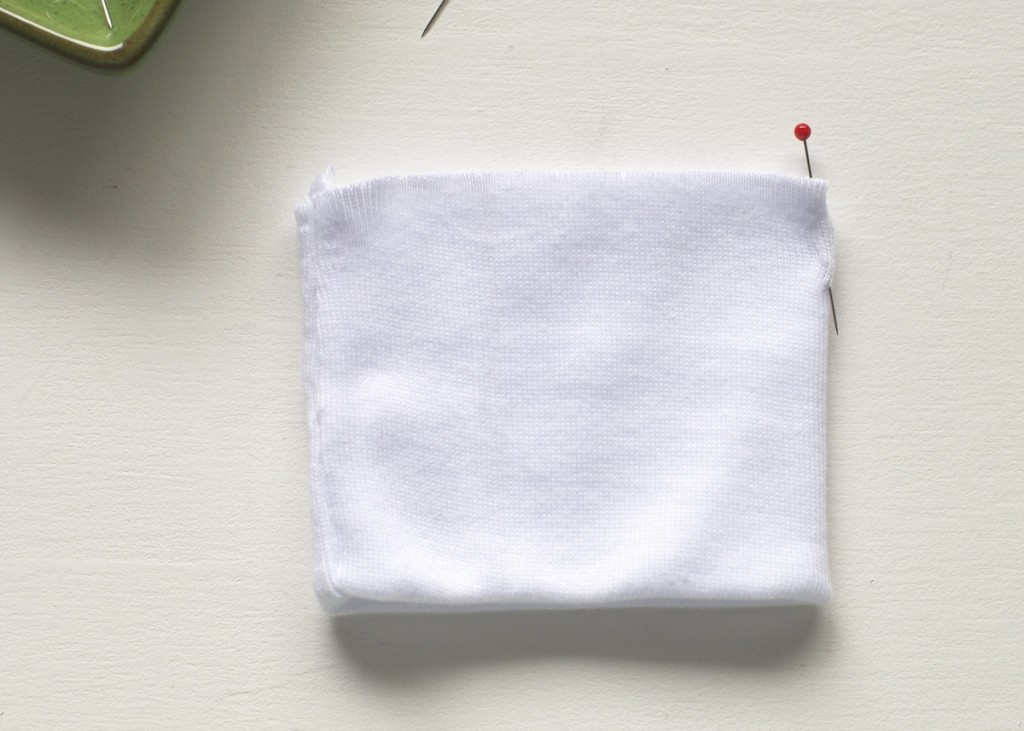
5. Fold the cuff piece over from left to right and overlock the side seam so you have a tall skinny tube. Repeat for the other cuff piece.
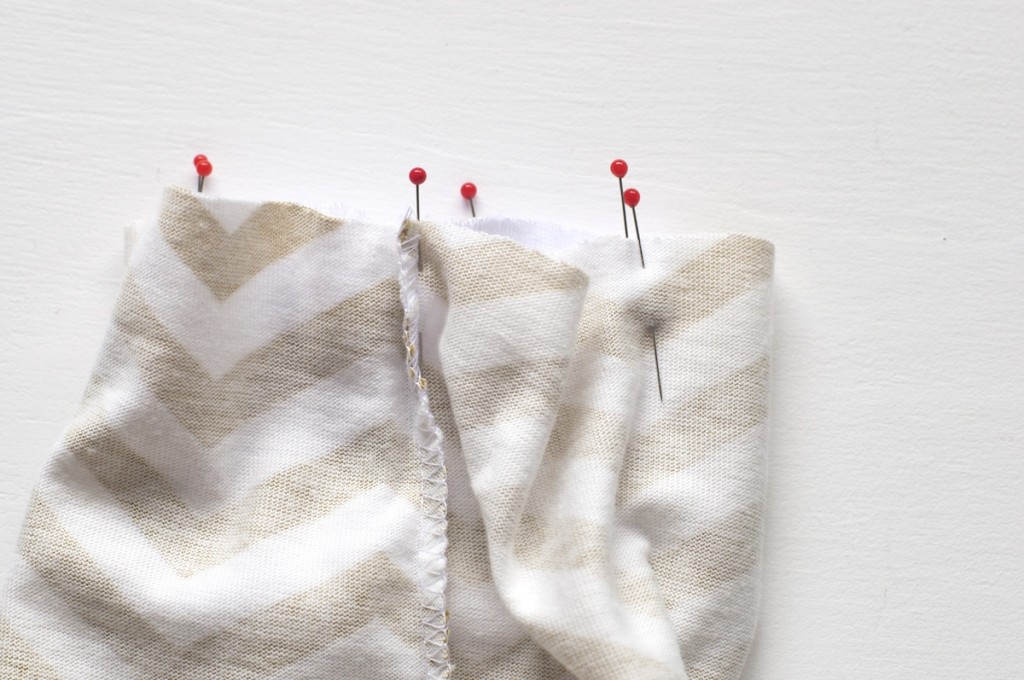
6. Fold the top down over the bottom, folding the cuff in half, with the wrong sides together and the seam hidden inside. Repeat for the other cuff. Now we’re going to divide the cuff and the hem of the pants into quarters to make sure they’re gathered evenly. Turn the pants so they are inside out. Lie the cuff/pants flat with the seam to one side. Mark the side opposite it with a pin.
Align the seam and the pin you just placed and now mark the left and right sides with a pin also. Repeat these same steps for the pants hem.
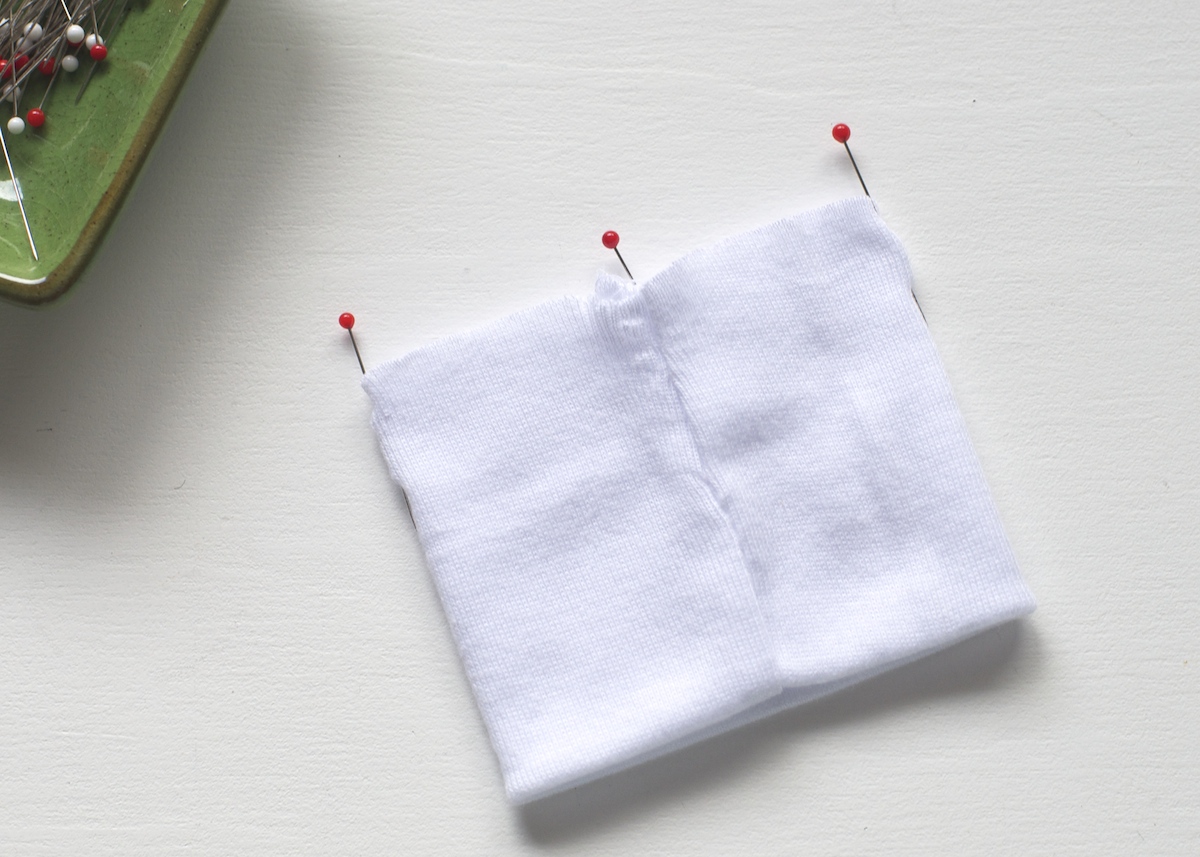
We now have four markers to helps us line the cuffs to the hem.
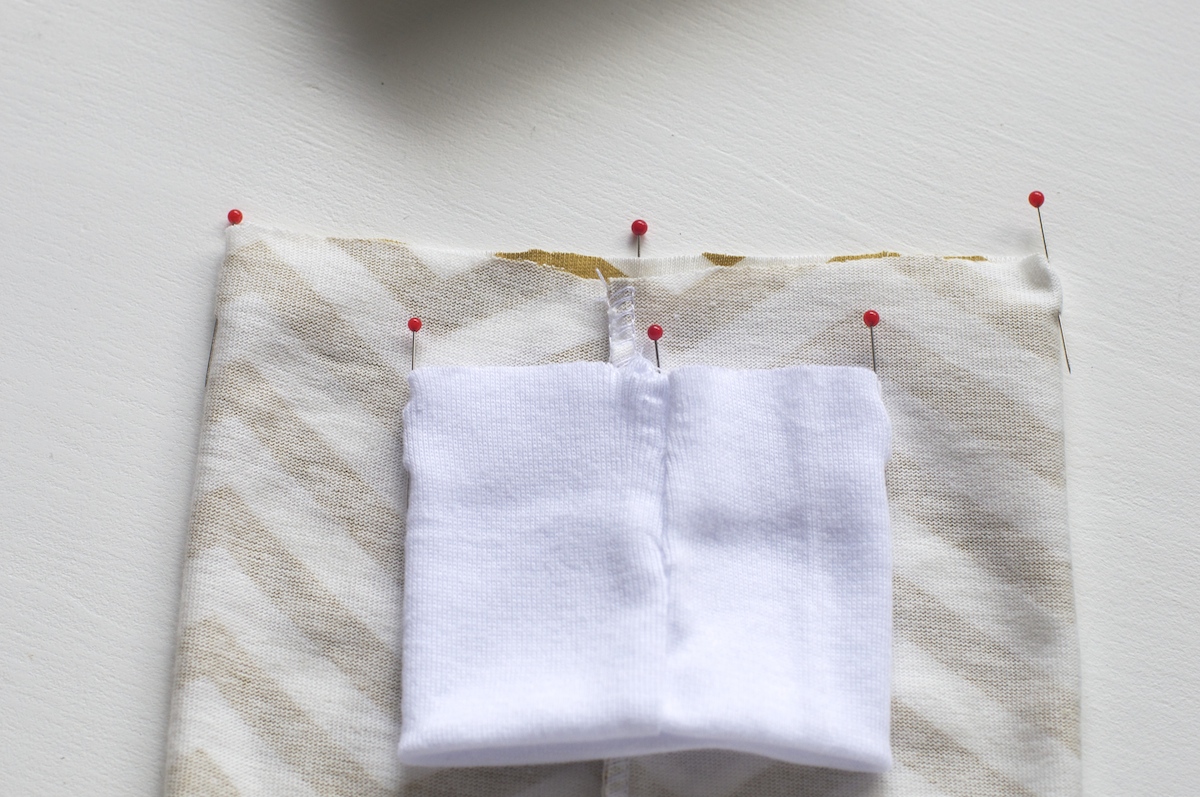
7. Place the cuff inside the pant leg so the right sides are together, and align the cuff seam with the pants seam and pin in place. Work around the hem aligning all four points. We need to stretch the cuffs so their markers align with the divides in the pants hem (remember we made the cuff piece smaller than the pants).
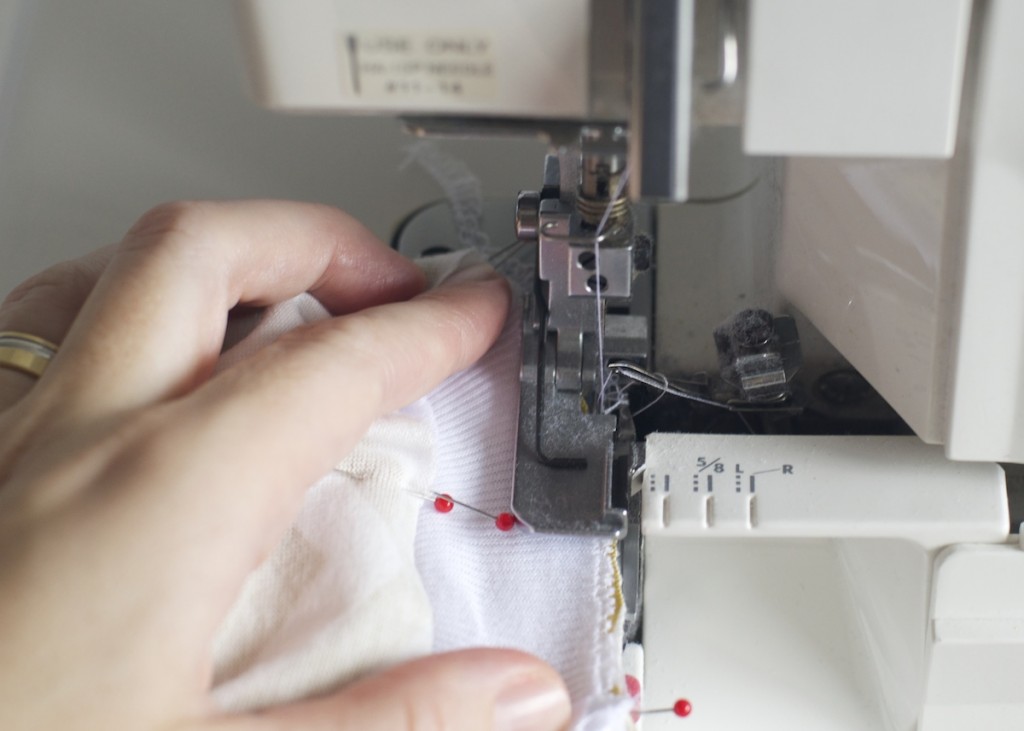
8. Overlock the raw edges, but don’t run over your pins! If you look closely, the cuff is inside the pants leg (which are inside out), and I’ve pulled the top of the pants to the side and am overlocking on top of the cuff. It is much easier to control the stretch of the cuffs between markers this way to ensure the gather is even the whole way around.
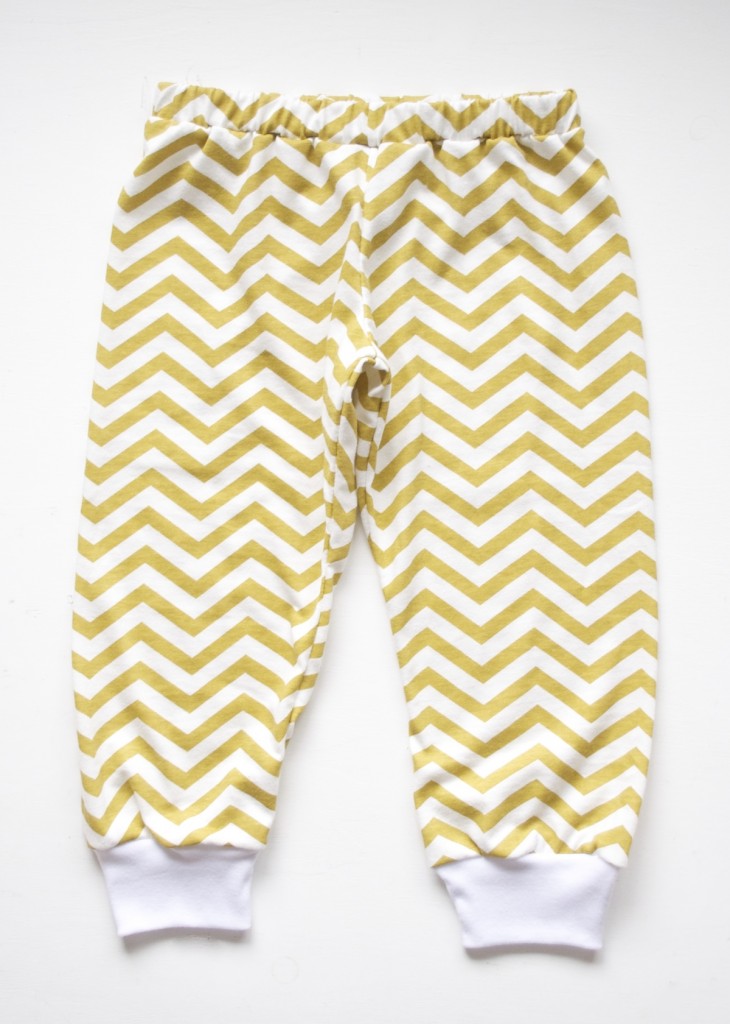
Repeat for the other leg, turn your pants right side out, and taa daa! Trackies!
I promise, reading this blog post will probably have taken you 25 times longer than sewing the actual pants, so go on, give it a go! I would love to see what you come up with, so make sure you share yours, either by leaving a link to your blog in the comments here or posting it on the wall at Facebook.
Love yas!


Thanks for the great tutorial Kathryn.
[…] Last week I showed you how you could use your Basics Collection pattern to whip up some trackies for your kiddos, this week I want to show you how to sew a waistband using your overlocker. […]